일단, cli 관련해서 계속해서 공부하다 보니, 노드 파일 시스템에 대한 제대로 된 이해 없이는 확실하게 이해하지 못할 거 같다는 생각이 들었다.
그래서 이번 주는 노드 파일 시스템 공부부터 시작했다.
노드 파일 시스템
전체를 다 알아보진 않을 거고 중요한 부분들 위주로 알아보도록 하자.
파일 시스템 모듈은 컴퓨터에 있는 파일 시스템이 작동하게 한다.
파일 생성, 삭제, 읽기, 쓰기 등 수행 가능하다고 보면 된다.
이 파일 시스템 모듈은 fs가 가지고 있다.
import fs from "fs";
이는 동기 방식으로 파일 시스템 모듈을 불러온 것이고, fs 자체에서도 Promise를 지원한다.
파일 시스템을 다루다 보면 비동기 방식으로 코드를 짜는 일이 많을 텐데, 항상 callback 함수로만 처리하다 보면, 콜백 헬이 발생할 수 있다.
따라서 fs 자체에서 지원하는 Promise를 사용하는 것이 좋다.
shadcn 코드에서도 아래와 같이 fs의 Promise를 사용해서 파일 시스템 관련 작업을 수행한다.
import { promises as fs } from "fs"
이렇게 하면 우리가 아는 Promise를 사용할 수 있게 되고, 콜백 함수 대신 then, catch 문을 이용할 수 있게 된다.
아래와 같이 사용할 수 있겠다.
import { promises as fs } from "fs";

fs.writeFile("./temp.txt", "글이 입력됩니다.")
    .then(() => {
        return fs.readFile("./temp.text");
    })
    .then((data) => {
    	console.log(data.toString());
    })
    .catch((err) => {
    	throw err;
    });
위 코드에서 data를 문자열로 변환하는 이유가 궁금할 수 있다.
잠깐 알아보자면, data만 출력 시 아래와 같이 버퍼 데이터로 뜨기 때문에 문자열로 변환해 주는 과정이 필요한 것이다.

이렇게 Promise로 fs를 비동기 방식으로 동작시키는 방법을 알아봤는데, 여기서 좀 더 깔끔하게 async/await까지 사용해 볼 수도 있다.
import { fs as promises } from "fs";

async function main() {
    try {
    	await fs.writeFile("./temp.txt", "글이 입력됩니다.");
        const data = await fs.readFile("./temp.txt");
        console.log(data.toString());
    } catch (err) {
    	throw err;
    }
}

main();
컴포넌트 레지스트리 파일 생성
일단, 저번 주 글을 보면 알겠지만, 그때 나는 shadcn에서 배포한 컴포넌트 레지스트리 json 파일을 가져와서 그냥 2차 가공 후 add 명령어가 동작하도록 한 것이다.
아래 링크는 shadcn의 accordion 컴포넌트 레지스트리 파일이다.
https://ui.shadcn.com/registry/styles/default/accordion.json
어차피 우리도 이 파일을 만드는 과정을 알아야 하기 때문에 열심히 shadcn 레포지토리에 있는 코드들을 좀 분석해봤다.
shadcn에서는 build:registry라는 스크립트를 통해 컴포넌트 레지스트리 파일들을 생성하는 것을 확인했다.
이때 사용하는 파일이 build-registry.mts 파일인데 이 파일 로직을 참고해서 하나의 컴포넌트 레지스트리 파일을 생성해 보는 cli 명령어를 먼저 짜봤다.
"scripts": {
    // ...
    "build:registry": "tsx --tsconfig ./tsconfig.scripts.json ./scripts/build-registry.mts && prettier --loglevel silent --write \"registry/**/*.{ts,tsx,mdx}\" --cache",
    // ...
  }
https://github.com/shadcn-ui/ui/blob/main/apps/www/scripts/build-registry.mts
registry 명령어 작성
아래는 내가 결과물로 원하는 아코디언 컴포넌트의 레지스트리 파일이다.
이제부터 나는 registry 명령어를 통해 의존성 및 파일 내용을 가공해서 해당 레지스트리 파일을 만들려고 한다.
{
  "name": "accordion",
  "dependencies": [
    "@radix-ui/react-accordion"
  ],
  "files": [
    {
      "name": "accordion.tsx",
      "content": "\"use client\"\n\nimport * as React from \"react\"\nimport * as AccordionPrimitive from \"@radix-ui/react-accordion\"\nimport { ChevronDown } from \"lucide-react\"\n\nimport { cn } from \"@/lib/utils\"\n\nconst Accordion = AccordionPrimitive.Root\n\nconst AccordionItem = React.forwardRef\u003C\n  React.ElementRef\u003Ctypeof AccordionPrimitive.Item\u003E,\n  React.ComponentPropsWithoutRef\u003Ctypeof AccordionPrimitive.Item\u003E\n\u003E(({ className, ...props }, ref) =\u003E (\n  \u003CAccordionPrimitive.Item\n    ref={ref}\n    className={cn(\"border-b\", className)}\n    {...props}\n  /\u003E\n))\nAccordionItem.displayName = \"AccordionItem\"\n\nconst AccordionTrigger = React.forwardRef\u003C\n  React.ElementRef\u003Ctypeof AccordionPrimitive.Trigger\u003E,\n  React.ComponentPropsWithoutRef\u003Ctypeof AccordionPrimitive.Trigger\u003E\n\u003E(({ className, children, ...props }, ref) =\u003E (\n  \u003CAccordionPrimitive.Header className=\"flex\"\u003E\n    \u003CAccordionPrimitive.Trigger\n      ref={ref}\n      className={cn(\n        \"flex flex-1 items-center justify-between py-4 font-medium transition-all hover:underline [&[data-state=open]\u003Esvg]:rotate-180\",\n        className\n      )}\n      {...props}\n    \u003E\n      {children}\n      \u003CChevronDown className=\"h-4 w-4 shrink-0 transition-transform duration-200\" /\u003E\n    \u003C/AccordionPrimitive.Trigger\u003E\n  \u003C/AccordionPrimitive.Header\u003E\n))\nAccordionTrigger.displayName = AccordionPrimitive.Trigger.displayName\n\nconst AccordionContent = React.forwardRef\u003C\n  React.ElementRef\u003Ctypeof AccordionPrimitive.Content\u003E,\n  React.ComponentPropsWithoutRef\u003Ctypeof AccordionPrimitive.Content\u003E\n\u003E(({ className, children, ...props }, ref) =\u003E (\n  \u003CAccordionPrimitive.Content\n    ref={ref}\n    className=\"overflow-hidden text-sm transition-all data-[state=closed]:animate-accordion-up data-[state=open]:animate-accordion-down\"\n    {...props}\n  \u003E\n    \u003Cdiv className={cn(\"pb-4 pt-0\", className)}\u003E{children}\u003C/div\u003E\n  \u003C/AccordionPrimitive.Content\u003E\n))\n\nAccordionContent.displayName = AccordionPrimitive.Content.displayName\n\nexport { Accordion, AccordionItem, AccordionTrigger, AccordionContent }\n"
    }
  ],
}
아래 링크 및 파일은 registry cli 명령어 완성 코드 및 링크이다.
만약 내가 아코디언 컴포넌트 구현을 다 해둔 상태라면, 아래 명령어를 작동시키게 되면 위와 같은 accordion.json, 즉 아코디언 컴포넌트 레지스트리 파일이 생성이 되는 것이다.
https://github.com/ghdtjgus76/design-system-cli/blob/main/packages/cli/src/commands/registry.js
import { Command } from "commander";
import { promises as fs } from "fs";
import { Project } from "ts-morph";
import { filterExistingPath } from "../utils/filterExistingPath.js";
import { z } from "zod";
import path from "path";

const registryOptionSchema = z.object({
  component: z.string(),
  path: z.string(),
});

const program = new Command();

export const registry = program
  .name("registry")
  .description("create component registry file")
  .argument("component", "the component to create registry")
  .requiredOption("-p, --path <path>", "the path of the component")
  .action(async (component, opts) => {
    const options = registryOptionSchema.parse({
      component,
      ...opts,
    });

    const componentPath = path.resolve(options.path);

    const project = new Project();
    const sourceFile = project.addSourceFileAtPath(componentPath);

    const dependencies = [];

    sourceFile.getImportDeclarations().forEach((importDeclaration) => {
      const module = importDeclaration.getModuleSpecifier().getLiteralValue();

      if (filterExistingPath(module)) {
        dependencies.push(module);
      }
    });

    const filePath = `${component}.json`;

    const fileContent = {
      name: `${component}`,
      dependencies,
      files: [
        {
          name: `${component}.tsx`,
          content: sourceFile.getText(),
        },
      ],
    };
    const stringifiedFileContent = JSON.stringify(fileContent);

    await fs.writeFile(filePath, stringifiedFileContent);
  });

program.parse();
로직에 대해서 간단하게만 설명하자면, 컴포넌트명과 해당 컴포넌트 파일의 경로를 option으로 입력하고 해당 컴포넌트 파일에서 import 구문 분석을 통해서 dependency를 파싱 하게 된다.
또한, 해당 파일 내용을 가져온 후 파일 내용을 알맞은 객체 형태로 작성해 주고 문자열화해 주면 우리가 원하는 형태의 json 파일을 만들 수 있게 된다.
마지막으로, 이 내용들을 원하는 경로에 써주기만 하면 하나의 컴포넌트에 대해서 레지스트리를 생성하는 cli 명령어 로직을 완성하게 된다.
이렇게 만든 레지스트리 파일을 깃허브에 올려뒀고, github pages를 활용해서 배포를 해봤다.
json 파일 배포는 처음이었는데 아래와 같이 원하는 대로 잘 배포된 것을 볼 수 있다.
https://ghdtjgus76.github.io/design-system-cli/packages/registry/accordion.json
빌드 스크립트 작성
이제는 shadcn처럼 나도 빌드 스크립트를 통해서 좀 단순하게 실행시켜보고 싶다는 생각이 들었다.
그래서 위 registry cli 명령어를 빌드 스크립트로 재작성했다.
다만, 첫 번째 시도에는 하나의 컴포넌트만 동작하는 로직 그대로 작성하였다.
아래와 같은 코드를 작성했고, 문제점이 두 가지 있었다.
1. 하나의 컴포넌트 레지스트리만 생성하는 것이 비효율적이다.
2. 레지스트리 생성 시마다 매번 경로를 인자로 넘겨줘야 한다.
"build:registry": "node ./src/scripts/build-registry.js"import path from "path";
import { promises as fs } from "fs";
import { Project } from "ts-morph";
import { filterExistingPath } from "../utils/filterExistingPath.js";
const buildRegistry = async (component, componentPath, registryPath) => {
const absoluteComponentPath = path.resolve(componentPath);
const project = new Project();
const sourceFile = project.addSourceFileAtPath(absoluteComponentPath);
const dependencies = [];
sourceFile.getImportDeclarations().forEach((importDeclaration) => {
const module = importDeclaration.getModuleSpecifier().getLiteralValue();
if (filterExistingPath(module)) {
dependencies.push(module);
}
});
const filePath = `${registryPath}/${component}.json`;
const fileContent = {
name: `${component}`,
dependencies,
files: [
{
name: `${component}.tsx`,
content: sourceFile.getText(),
},
],
};
const stringifiedFileContent = JSON.stringify(fileContent);
await fs.writeFile(filePath, stringifiedFileContent);
};
buildRegistry(process.argv[2], process.argv[3], process.argv[4]).catch(
(error) => {
console.error("An error occurred:", error);
process.exit(1);
}
);
위에 언급한 첫 번째 문제를 해결할 수 있도록 다시 빌드 스크립트를 작성하였다.
주요 로직은 위와 거의 비슷하지만, 컴포넌트가 들어있는 상위 경로에서 컴포넌트 파일들을 불러와서 컴포넌트 레지스트리 파일을 생성한다는 것이 차이점이다.
import { promises as fs, existsSync } from "fs";
import { Project } from "ts-morph";
import { filterExistingPath } from "../utils/filterExistingPath.js";

const buildRegistry = async (componentDir, registryPath) => {
  if (!existsSync(componentDir) || !existsSync(registryPath)) {
    console.error(`The path does not exist. Please try again.`);
    process.exit(1);
  }

  const project = new Project();
  const componentFiles = await fs.readdir(componentDir);
  componentFiles.forEach(async (componentFile) => {
    const componentFilePath = componentDir + "/" + componentFile;
    const sourceFile = project.addSourceFileAtPath(componentFilePath);

    const dependencies = [];

    sourceFile.getImportDeclarations().forEach((importDeclaration) => {
      const module = importDeclaration.getModuleSpecifier().getLiteralValue();

      if (filterExistingPath(module)) {
        dependencies.push(module);
      }
    });

    const componentName = componentFile.split(".")[0];

    const filePath = `${registryPath}/${componentName}.json`;

    const fileContent = {
      name: `${componentName}`,
      dependencies,
      files: [
        {
          name: `${componentName}.tsx`,
          content: sourceFile.getText(),
        },
      ],
    };
    const stringifiedFileContent = JSON.stringify(fileContent);

    await fs.writeFile(filePath, stringifiedFileContent);
  });
};

buildRegistry(process.argv[2], process.argv[3], process.argv[4]).catch(
  (error) => {
    console.error("An error occurred:", error);
    process.exit(1);
  }
);
이렇게 하고 나면, 끝일 거 같지만,,, 아직 한 가지 과정이 더 남아있다.
컴포넌트를 설치할 때 add 명령어를 실행한다고 했었는데, 이 add 명령어를 실행하면 사용자의 터미널에 add 할 컴포넌트 선택지를 준다.
이는 전체 컴포넌트의 레지스트리를 정리한 파일에서 컴포넌트 명을 불러와서 보여주는 것인데, 이 또한 shadcn 페이지에 배포되어 있다.
이것까지 동일하게 구현해 보았다.
또한 인자로 미리 경로들을 넘겨주어 위에서 언급한 두 번째 문제도 해결하였다.
코드는 아래와 같은데, 아까 빌드 스크립트 파일에 전체 컴포넌트 레지스트리 생성 로직만 추가한 것이다.
전체 컴포넌트 레지스트리는 index.json 파일에 저장하도록 했다.
import { promises as fs, existsSync } from "fs";
import { Project } from "ts-morph";
import { filterExistingPath } from "../cli/src/utils/filterExistingPath.js";
import path from "path";

const buildRegistry = (componentName, dependencies) => {
  const fileContent = {
    name: componentName,
    dependencies,
    files: `${componentName}.tsx`,
  };

  return fileContent;
};

const buildComponentRegistries = async (componentDir, registryPath) => {
  const {
    componentDir: absoluteComponentDir,
    registryPath: absoluteRegistryPath,
  } = {
    componentDir: path.resolve(componentDir),
    registryPath: path.resolve(registryPath),
  };

  if (!existsSync(absoluteComponentDir) || !existsSync(absoluteRegistryPath)) {
    console.error(`The path does not exist. Please try again.`);
    process.exit(1);
  }

  const project = new Project();
  const componentFiles = await fs.readdir(absoluteComponentDir);
  const registryFileContent = [];

  componentFiles.forEach(async (componentFile) => {
    const componentFilePath = absoluteComponentDir + "/" + componentFile;
    const sourceFile = project.addSourceFileAtPath(componentFilePath);
    const componentDependencies = [];

    sourceFile.getImportDeclarations().forEach((importDeclaration) => {
      const module = importDeclaration.getModuleSpecifier().getLiteralValue();

      if (filterExistingPath(module)) {
        componentDependencies.push(module);
      }
    });

    const componentName = componentFile.split(".")[0];

    const componentRegistryFilePath = `${absoluteRegistryPath}/${componentName}.json`;

    const componentRegistryFileContent = {
      name: `${componentName}`,
      dependencies: componentDependencies,
      files: [
        {
          name: `${componentName}.tsx`,
          content: sourceFile.getText(),
        },
      ],
    };
    const stringifiedComponentFileContent = JSON.stringify(
      componentRegistryFileContent
    );

    const registryComponentFileContent = buildRegistry(
      componentName,
      componentDependencies
    );
    registryFileContent.push(registryComponentFileContent);

    await fs.writeFile(
      componentRegistryFilePath,
      stringifiedComponentFileContent
    );
  });

  await fs.writeFile(
    `${registryPath}/index.json`,
    JSON.stringify(registryFileContent)
  );
};

buildComponentRegistries("../ui/components/designed-ui", "../registry").catch(
  (error) => {
    console.error("An error occurred:", error);
    process.exit(1);
  }
);
결과물은 아래와 같다.
https://ghdtjgus76.github.io/design-system-cli/packages/registry/
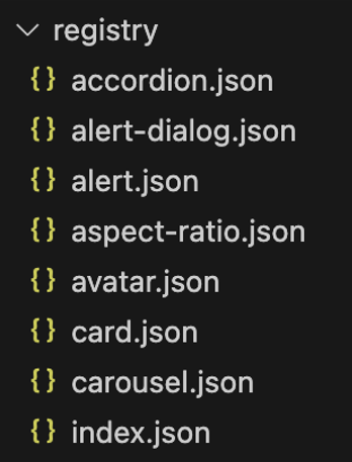
이제 마지막으로 add 명령어에서 컴포넌트 레지스트리 정보를 불러올 때 shadcn 사이트가 아니라 내 사이트에서 불러오도록 변경만 해주니까 잘 동작하는 것까지 확인할 수 있었다.
forEach vs for... of
그런데, 한 가지 문제점이 있었다.
잘 동작하는 것 같았지만, 아래와 같이 컴포넌트 의존성 다운로드가 제대로 되지 않는 모습을 확인할 수 있었다.
의존성이 다운로드 받아질 때 package.json에 한 줄씩 의존성이 추가되어야 하는데, 덮어씌워지는 모습을 발견할 수 있었다.
이는 바로, forEach 구문 때문인데, forEach 메서드는 콜백 함수를 동기적으로 실행하지 않는다고 한다.
콜백 함수 내부에서 비동기 작업을 수행하게 되면 각 작업들이 병렬적으로 수행이 되기 때문에 하나의 컴포넌트 관련 의존성을 다운로드하더라도 다른 의존성을 함께 다운로드하게 되는 것이다.
그래서, forEach 구문을 for... of 구문으로 변경하였다.
https://github.com/ghdtjgus76/design-system-cli/commit/27ad3a55b70b3d90f6c6c568a61f1488f62b8879
for...of 구문은 비동기 로직을 처리하더라도 동기적으로 처리하기 때문에 첫 번째 컴포넌트 의존성을 다운로드하고 있는 와중에는 두 번째 컴포넌트 의존성을 다운로드하지 않게 된다.
따라서 순차적으로 작업이 수행된다.
아래 영상으로 확인하자.
이번에는 이렇게 컴포넌트 레지스트리 생성 로직과 json 파일 배포까지만 해봤는데, 다음 주는 base-ui(headless ui)는 컴포넌트 자체를 npm에 배포하고, designed-ui는 cli 명령어를 npm에 배포해서 잘 적용이 되는지 테스트해 보는 시간을 가져보기로 했다.
참고 자료
https://velog.io/@new_wisdom/Node.js-3-File-System
'프로젝트 개발일지 > warrr-ui 디자인 시스템' 카테고리의 다른 글
| [warrr-ui 디자인 시스템 개발기] CI/CD (0) | 2024.05.16 |
|---|---|
| [warrr-ui 디자인 시스템 개발기] cli 라이브러리 npm 배포 (1) | 2024.05.01 |
| [warrr-ui 디자인 시스템 개발기] commander를 활용한 init, add cli 실습 (0) | 2024.04.11 |
| [warrr-ui 디자인 시스템 개발기] shadcn ui 분석 (1) | 2024.03.30 |
| [warrr-ui 디자인 시스템 개발기] css 라이브러리 분석 (panda css) (0) | 2024.03.19 |